Guide: How To Scan on an iPhone or iPad
- Did you know that the iPhone or iPad has a built-in scanner? In this article, we identified the features of this scanner.
- It’s easy to scan a document using an iPhone or iPad. Learn the whole scanning process below.
- If you’re unsatisfied with your scans, there are multiple ways to improve the results. Learn more about getting high-quality scanned documents.
Scan Your Documents Using The iPhone's Built-in Scanner
- The iPhone or iPad includes a document scanning feature that converts physical documents into scanned files.

How To Scan Documents Using Your iPhone
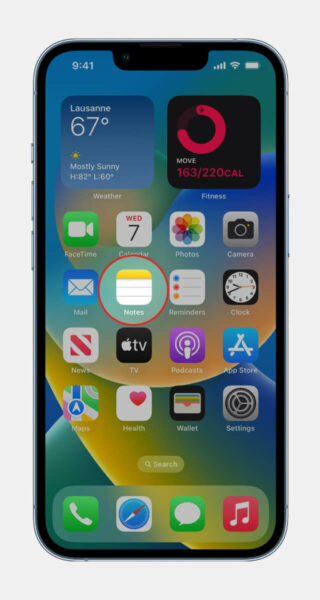
- Open Notes.
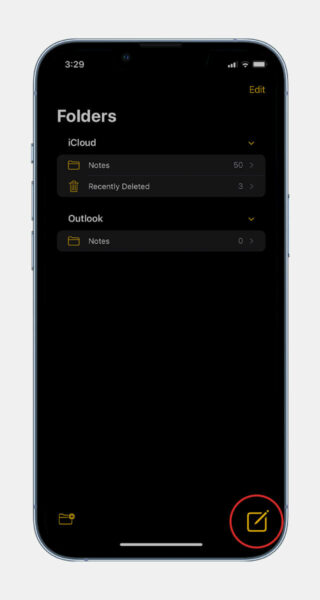
- Tap New Note.
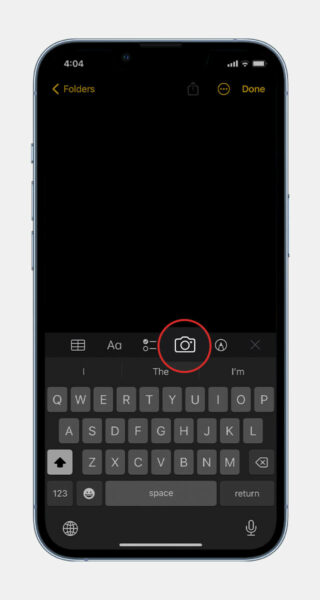
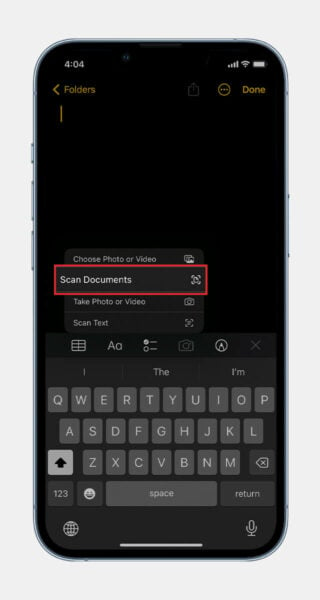
- Tap the Camera icon.
- Tap Scan Documents to start scanning.
- Save the scanned document.
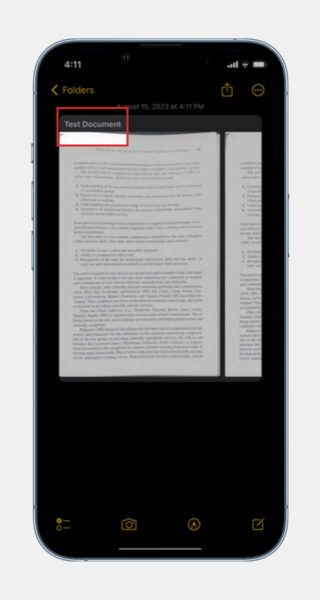
- Add a name for your document.
For more detailed steps, click here.
Improve The Quality of Your Scans
The following features can be found when you open a saved scanned image on the Notes app.
- Add a page: After saving the document, tap the plus icon in the bottom-left corner of the image.
- Adjust a file’s orientation: Select the rotation icon at the bottom of the screen.
- Rename a document: Tap the file name on top of the scan.
- Crop a scanned page: Select the crop icon, a four-point cropping box with circles around the corners.
Save Your Scans in PDF or JPG
PDF Format
- Open the Notes app and select a note.
- Tap the scanned image.
- Tap the Share button.
- Choose Save to Files from the iOS share sheet.
- Select iCloud Drive or On My iPhone.
- Tap Save. The final result saved in your Files app is in PDF format.
JPG Format
- Open your Settings app.
- Select Notes.
- Scroll down and turn on the toggle for Save to Photos. This saves your scans automatically from the Notes app to your camera roll.
Share and Sign Your Scanned Documents
Share Your Scanned Document:
- Open the Files app or your camera roll.
- Look for the scanned document.
- Touch and hold the scanned document.
- Tap Share.
- Choose where you want to send it (AirDrop, Mail, Messages, etc.)
- Tap Send.
Sign Your Scanned Document:
- Open the Notes app.
- Tap your scanned document to open.
- Tap the Share button.
- Tap Markup.
- Select the Add button.
- Select Signature.
- Add your saved signature or create a new one.
- Change the size of the signature box and place it accordingly.
- Tap Done.
Can You Scan a Document With an iPhone?
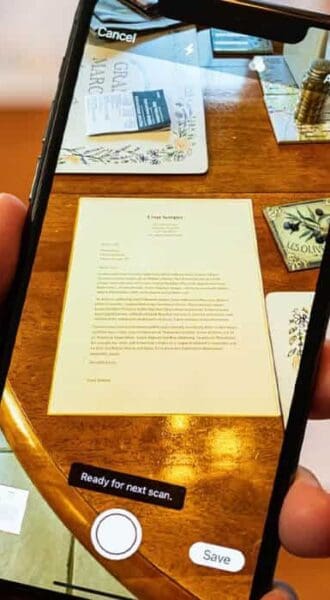
Yes, you can scan documents with your iPhone or iPad. It is now common practice to be asked to scan documents to sign and send them. However, not everyone has those fancy printers with scanners, and even if you do, it’s inconvenient when you’re asked to send a document on the spot, and you’re outside.
This is where the iPhone’s document scanner comes in handy. You can scan an entire document with just your phone, even with multiple pages.
Scan With Your iPhone Using the Notes App
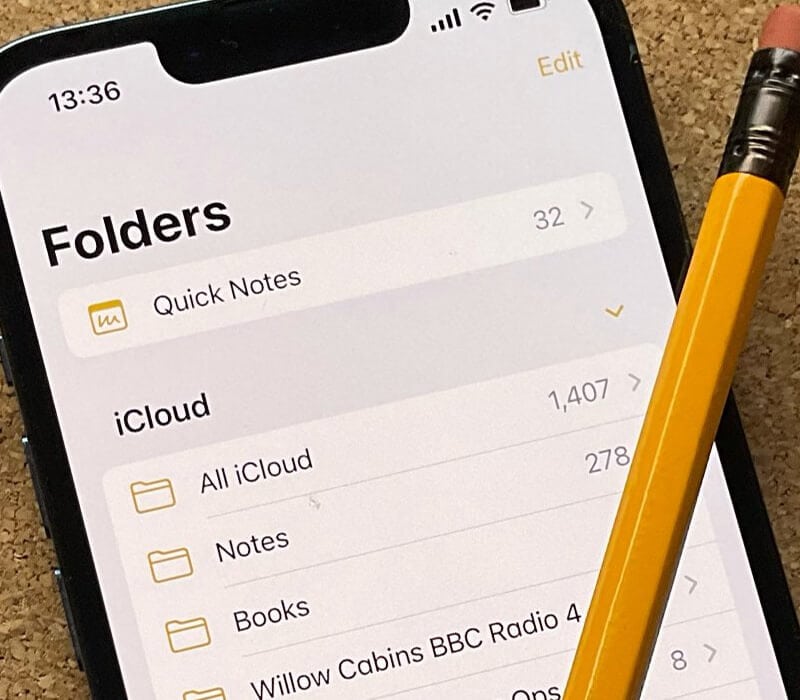
The Notes app is the main tool you need for scanning documents on your iPhone. The app can capture your documents using the iPhone’s camera automatically.
No matter how many pages you plan to scan, it will generate a scanned image that you can later convert into the format you want and then send to other users.
Below, we have outlined the how-tos of doing a scan using your iPhone.
1st Step: Open iPhone's Notes App and Create a New Note
You have to create a new note to be able to scan a document. To open a new note, follow these steps:
- Open Notes.
- Tap New Note.
2nd Step: Tap the Camera Icon
Once you’ve opened a new or existing note, your iPhone’s keyboard will be displayed on the screen. Follow these steps when your keyboard shows up:
- Select the camera icon.
- Tap Scan Documents.
3rd Step: Start Scanning
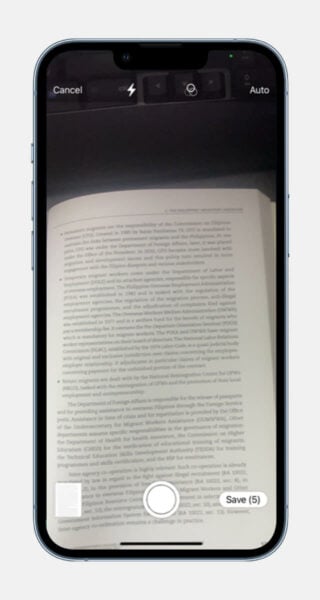
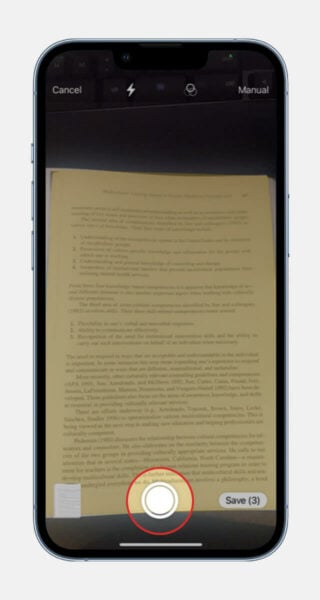
After completing the 2nd step, your iPhone will automatically open the rear camera and begin scanning the document it finds.
- The scanned document will be displayed as an image and added to your note’s pile of scanned files.
- The best way to scan is to place the document on a flat surface. Keep your iPhone parallel to the document when capturing the image.
4th Step (Optional): Do a Manual Scan
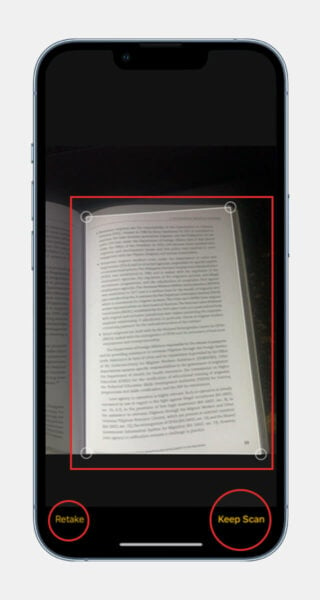
This is only an option if you prefer to scan manually rather than using the initial method. With this setting, you can adjust the capture area to match the document’s corners.
- Tap the shutter button.
- Make adjustments to the bounding box if appropriate.
- Tap Keep Scan to add the result to your scanned pages. You may also tap Retake if you want to capture the document again.
You can tap Auto to switch your settings to automatic scan mode.
5th Step: Save the Scanned Documents
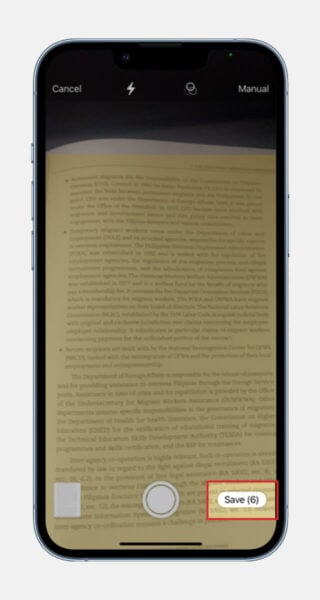
If you’re done with your scans, you can now save them. On the bottom-right display of your screen > tap Save.
- The number in parentheses is the number of scanned pages or captures included in your note.
- When you press Save, all your current captures will be saved to the same note.
6th Step: Don’t Forget the Document's Name
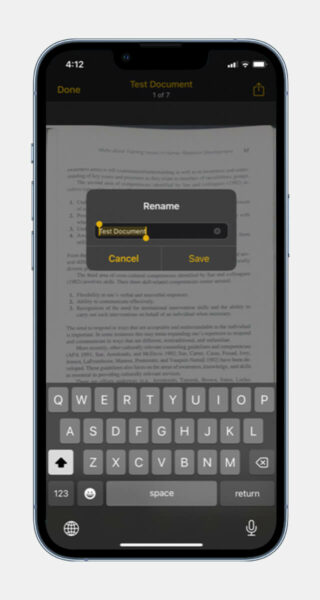
Your iPhone’s Notes app will automatically provide a title to your note. If you want to give your note a more specific name, follow these steps:
- Tap your scanned image on the Notes page.
- Tap the document title on top.
- Type in the title you prefer on the Rename popup and tap Save.
- In the top-left of your screen, tap Done.
What File Types Does the iPhone Scanner Generate?
Scanned documents from the Notes app are typically saved as PDF files, but there is also a method for saving them as JPG files. This is useful because users have different requirements for document formats.
PDF Format
The PDF is the commonly used file format for scans with multiple pages.
To save a scanned document in this format, follow these steps:
- Open the Notes app and select a note.
- Tap the scanned image to make any final adjustments.
- Tap the Share button in the upper-right corner of your screen.
- Choose Save to Files from the iOS share sheet.
- Select iCloud Drive or On My iPhone, depending on where you want to keep the file.
- Tap Save.
- The final result saved in your Files app is in PDF format.
JPG Format
Some users may require a scanned document in .jpg format due to compatibility issues. This is possible by scanning the document automatically from the Notes app to your camera roll.
To achieve this, you need to follow the steps below before you scan on an iPhone:
- Open your Settings app.
- Select Notes.
- Scroll down and turn on the toggle for Save to Photos.
How To Maximize Scanned Documents on iPhone
The built-in scanner of the Notes app does more than just scan documents. Other features allow you to maximize the final document on your iPhone. These include editing the files, sharing, and even signing them.
Make Adjustments to Your Scanned Document:
Editing a scanned document allows you to define the corners, rotate the document, add more pages, and more. The following features can be found when you open a saved scanned image on the Notes app.
- Adding a page: After saving the document, tap the plus icon in the bottom-left corner of the image.
- Adjusting a file’s orientation: Select the rotation icon at the bottom of the screen. This rotates your image to the left.
- Renaming a document: Tap the file name on top of the scan.
- Cropping a scanned page: Select the crop icon. A four-point cropping box with circles around the corners will assist you in cropping your document precisely.
Share Your Scanned Document:
After making the necessary changes, you can now send your scanned page to another user. This is a convenient feature for employees, students, or anyone who needs to send scanned files quickly.
- Open the Files app or your camera roll.
- Look for the scanned document.
- Touch and hold the scanned document.
- Tap Share.
- Choose where you want to send it (AirDrop, Mail, Messages, etc.)
- Tap Send.
Sign Your Scanned Document:
Electronic signatures, also known as e-signatures, are signatures in a digital format. In this modern time, wherein traditional methods of collecting signatures via mail or fax are less popular, being able to sign a document on your iPhone is a huge convenience.
That’s why another useful feature offered by iPhone’s built-in document scanner is to sign scanned documents. To sign a scanned document directly on your phone, follow these steps:
- Open the Notes app.
- Tap your scanned document to open.
- Tap the Share button.
- Tap Markup.
- Select the Add button.
- Select Signature.
- Add your saved signature or create a new one.
- Change the size of the signature box as you want and place it anywhere on the document.
- Tap Done.
Frequently Asked Questions
How can I scan using my phone camera?
Open your camera app or download a scanning app, then position your phone over the document you want to scan while ensuring good lighting and focus. Most smartphones adjust automatically to capture clear images. Once captured, you can save or share the scan as needed.
How do I convert a document to a PDF on my iPhone?
Open the Notes app and create a new note to convert a document to a PDF on your iPhone. Tap the camera icon within the note and choose Scan Documents. Position your iPhone over the document, and it will automatically capture the page. Once scanned, you can save the document as a PDF.
