How to Screenshot on Mac in 2025 – 4 Easy Ways

A Guide to Capturing Screenshots on Your Mac
- Learn Mac screenshot shortcuts with Shift-Command-3, 4, and 5, as well as the Touch Bar, for easy and efficient captures and screen recording.
- Access the Screenshot application to choose from different types of screenshots & customize settings.
- Enhance screenshots using Markup tools, manage them effectively by understanding save locations/naming conventions, or change them according to your needs.
In this article:
- What are the ways to take a screenshot on Mac?
- Option 1. Mac screenshot shortcut to capture the full screen
- Option 2. How to take a screenshot of a window?
- Option 3. How to access and use the Screenshot application?
- Option 4. Touch Bar screenshots
- Enhance screenshots with Markup tools
- How to manage your screenshot on Mac?
OPTIONS: Ways To Take Screenshots on Mac
There are many ways to take screenshots on Mac. You may use the following options based on your preference:
- OPTION 1: Hold Shift-Command-3 together (full-screen capture).
- OPTION 2: Hold Shift-Command-4 together > Use the crosshair mouse button (specific region or window).
- OPTION 3: Hold Shift-Command-5 together (access the Screenshot application).
- OPTION 4: Hold Shift-Command-6 together (Touch Bar screenshots).
Alternative: How To Take a Screenshot on Mac Without a Keyboard
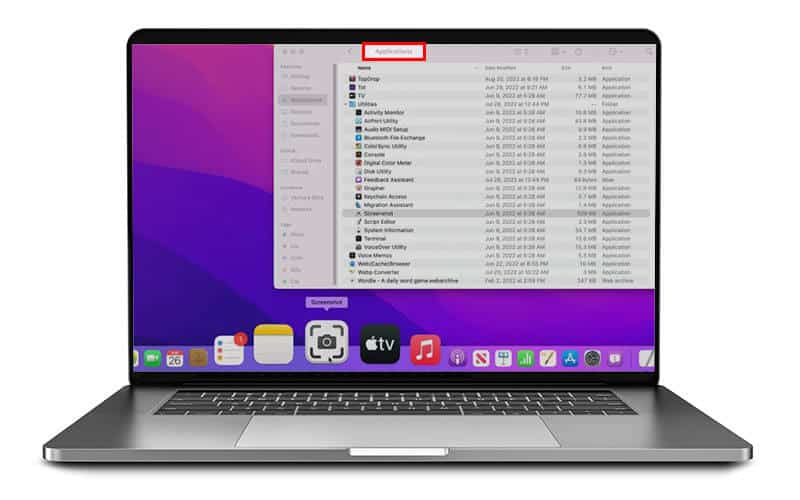
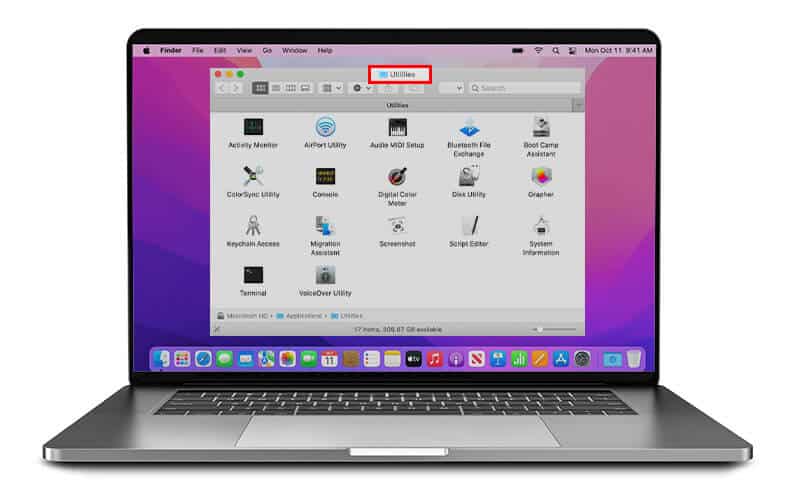
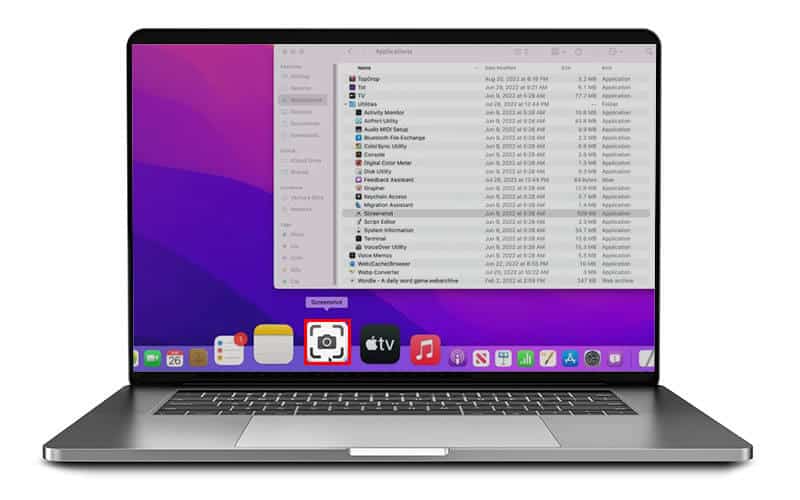
To take a screenshot without the keyboard, simply follow these steps:
- Open up your Applications folder.
- Head to Utilities.
-
Launch the Screenshot application.
How To Edit and Annotate Your Screenshots
After using shortcuts to take a screenshot, you will see a small floating thumbnail in the bottom-right corner of your screen, represented by a camera icon.
- Click the Floating Thumbnail option (camera icon) > Use basic annotation techniques and advanced editing features.
You can access the following features using the markup tools.
- Drawing/Using shapes
- Cropping
- Rotating
- Resizing
- Signing PDFs
How To Manage Your Screenshots
When you take a screenshot on a Mac, it is automatically saved to the desktop in PNG file format, with the file name “Screenshot,” followed by the date and time.
How To Change Your Screenshots’ Save Location
To select a new location where your screenshot is saved:
- Open the Screenshot app by pressing Shift + Command + 5 on your keyboard.
- In the Save As menu options, you can choose the location and rename your screenshot.
Do you find yourself relying on third-party programs to perform simple screen captures? That shouldn’t be the case because there are strategies to effortlessly capture screenshots on your Mac without needing external software.
In this blog post, we’ll look at how to take screenshots on your Mac, whether you want to capture the entire screen, a specific window, or just a portion of it. The best part is that you can do all this with only a few basic keyboard actions on your Mac. You’ll be able to create high-quality screenshots by mastering just a few keystrokes and also learn how to fine-tune your screenshots using your Mac.
Mastering Mac Screenshot Shortcuts
Taking screenshots on your Mac doesn’t have to be difficult. Three basic shortcuts can assist you in quickly and easily capturing your Mac screen. Whether you need to capture an entire page, a small region, or a window, or want to use the Screenshot application, these tools will make the job easy. Let’s look at some useful shortcuts:
- Shift-Command-3: This shortcut takes a full-page screenshot by capturing the entire screen.
- Shift-Command-4: This shortcut allows you to capture a specific region or window on your screen. To take a screenshot, move the crosshair cursor to the appropriate area and release the mouse button.
- Shift-Command-5: This shortcut opens the Screenshot App, which is included in recent versions of macOS Ventura. Additional features of the Screenshot App include capturing certain windows, recording your screen, and setting a timeframe for delayed screenshots.
Shift-Command-3: Entire Screen Capture
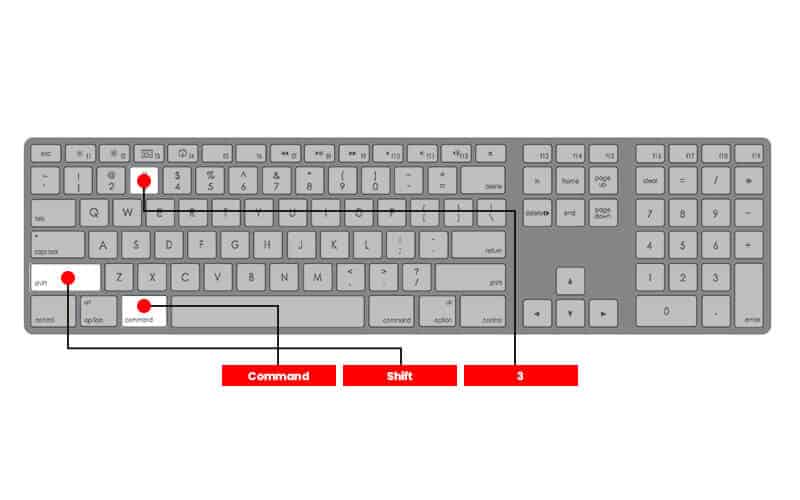
To capture your whole screen at once, all you have to do is press Command + Shift + 3. This shortcut quickly produces a quality image that doesn’t need any editing, resizing, or cropping. Once taken, the screenshot will appear on your desktop with an appropriate name like “Screen Shot [date] at [time].png,” so they are easy to locate and manage for future use.
Shift-Command-4: Custom Area or Window Capture
Using the keyboard shortcut Shift+Command+4 is a great way to quickly capture whatever you want on your screen. It will change the mouse button or cursor to a crosshair, enabling you to select a specific area by clicking and dragging. Once you have chosen the desired area, release the mouse button or trackpad to capture a customized screenshot.
You have additional options available for capturing screenshots on your Mac. After selecting the entire screen or a specific window area, hold down the spacebar before releasing the mouse or trackpad. This allows you to reposition the screenshot anywhere within the window easily.
Shift-Command-5: Accessing the Screenshot App
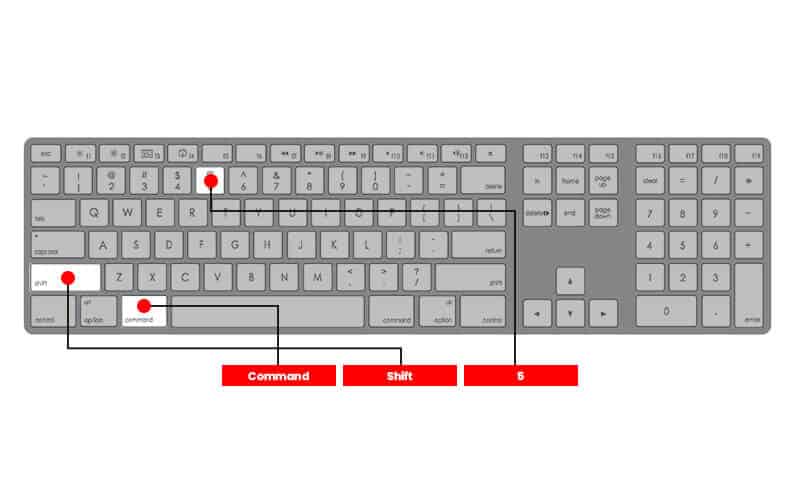
The Screenshot App is a great tool available on Mac computers, which can be accessed by pressing Shift+Command+5. It provides all the features necessary to take excellent screenshots of your entire screen or just particular elements such as windows and selections. This app’s suite of tools includes video recording capability with both fullscreen capture options and limited capturing possibilities.
To access the Screenshot App on your Mac, simply use the keyboard shortcut Shift-Command-5. This handy tool offers a range of features to capture outstanding screenshots, such as capturing your entire screen or specific elements like windows. It even includes the ability to take screen recordings, which allows you to choose between a full-screen capture or a specific portion of your screen.
Utilizing the Screenshot App
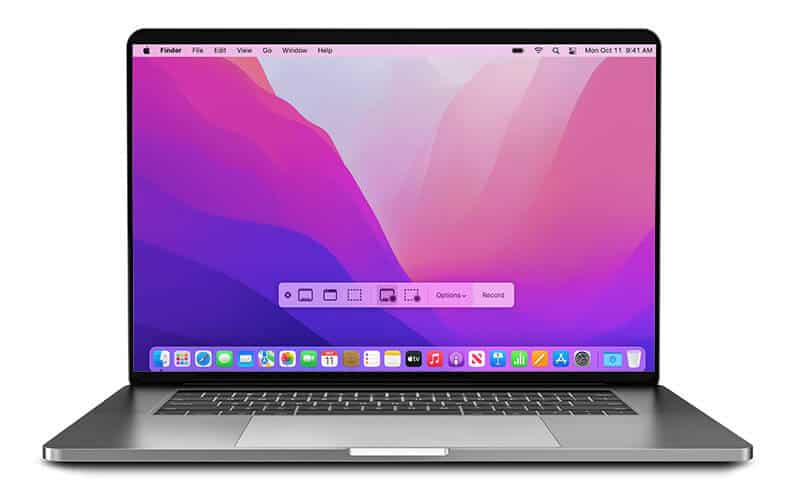
The Screenshot App on your Mac is more than just a tool for capturing your screen. It’s a helpful application that allows users to manage their screenshots effortlessly. With this app, you have complete control over the screenshots you take, ensuring that you always obtain the perfect images.
In this guide, we’ll walk you through the options menu and how to select the right screenshot type. By understanding and utilizing the features of this application, you’ll be able to make the most out of what it has to offer.
Choosing the Right Screenshot Type
When it comes to capturing screens, the Screenshot menu offers a range of options to suit your specific needs. To choose which best suits your requirements, click on the app icon. These are your screen capture options on the Screenshot menu:
- Rectangular capture: This option allows you to screenshot a specific rectangular area on your Mac’s screen.
- Freeform window capture: With this option, you can screenshot a non-rectangular area by selecting a freeform shape encompassing your desired content.
- Full-screen capture: This allows you to screenshot your Mac’s whole screen with a single click.
Navigating the Options Menu
The Screenshot App allows you to modify your screenshot preferences via its options menu. You can select where screenshots are saved and set a timer for delayed shots, with useful 5- or 10-second intervals available. If needed, you can also easily adjust the panel’s position on the screen by clicking and dragging it before capturing an image of the displayed content.
Touch Bar Screenshots
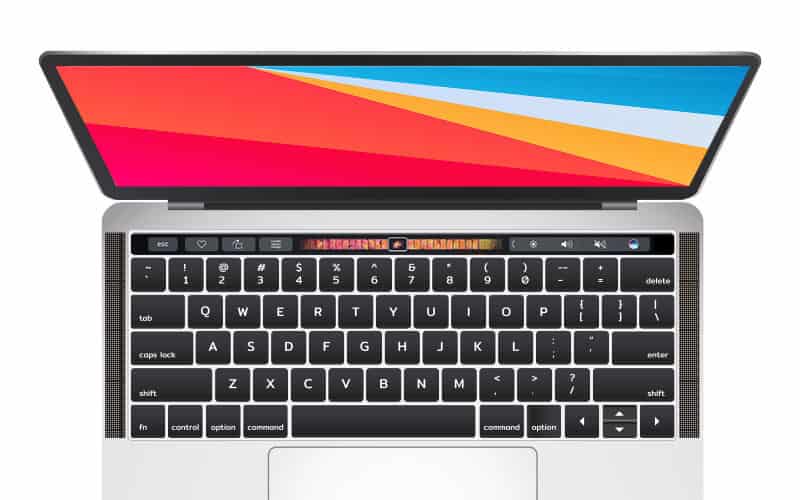
If you’re using an older MacBook Pro with the Touch Bar, taking screenshots of your Touch Bar is easy. You simply need to press Shift-Command-6, and your snapshot will be saved instantly.
Managing these captures is equally straightforward. Like regular screen grabs, you can easily save and edit them using the Screenshot App.
Enhancing Screenshots with Markup Tools
Now that you’ve learned to take screenshots on your Mac, it’s time to enhance them using Markup tools. These easy-to-use features allow you to add shapes, text, and other elements to make your captures more visually appealing and effectively convey important information.
The following sections show you how to access these helpful annotation techniques through the Floating Thumbnail. We’ll also explore basic and advanced editing options that allow you to get creative and make your screenshots more impressive.
Accessing Markup Tools through Floating Thumbnail
When you use the provided shortcuts to take a screenshot, you will see a small floating thumbnail in the bottom-right corner of your screen, represented by a camera icon. This thumbnail serves as a preview and can be clicked on to access the Markup features.
Clicking on it will open an overview window where you can find options such as adding text or shapes, adjusting the opacity of annotations, and choosing different font thickness levels to personalize your annotations.
Basic Annotation Techniques
Markup tools provide a range of helpful annotation techniques you can employ to give your captures extra emphasis and clarity. You can use colorful shapes to accent essential points, underline relevant text, or draw focus with circles – plus add notes, comments, and freehand illustrations.
These useful annotations make sharing images more meaningful between colleagues or friends and tidying up any personal collections of files in need of context.
Advanced Editing Features
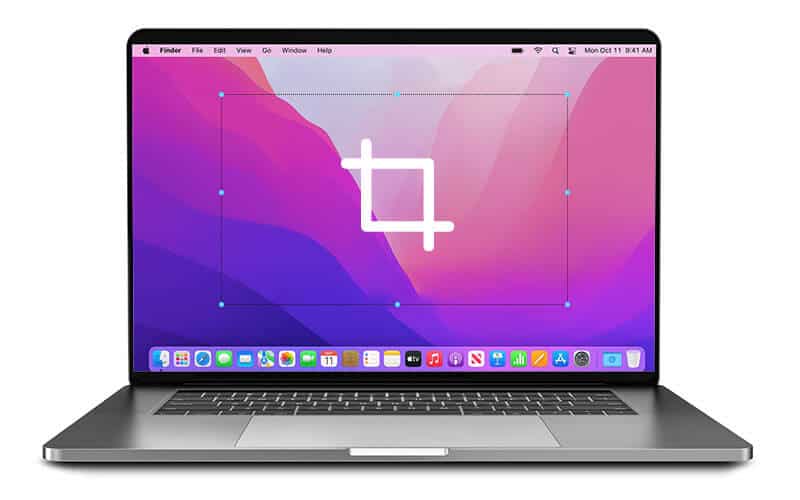
Markup tools are the way to go if you’re looking for advanced editing of your screenshots. This software enables custom-tailored results that look professional by offering these features:
- Cropping
- Rotating
- Resizing
- Signing PDFs
Managing Your Mac Screenshots
Now that you’ve mastered taking screenshots on a Mac, it’s time to discover the techniques for keeping them well-managed. A basic understanding of the typical save location and file names is key in organizing your shots so they remain easily accessible.
We’ll discuss how these defaults can be tailored specifically to suit what works best for you, both their destinations and labeling conventions.
Default Save Locations and Naming Conventions
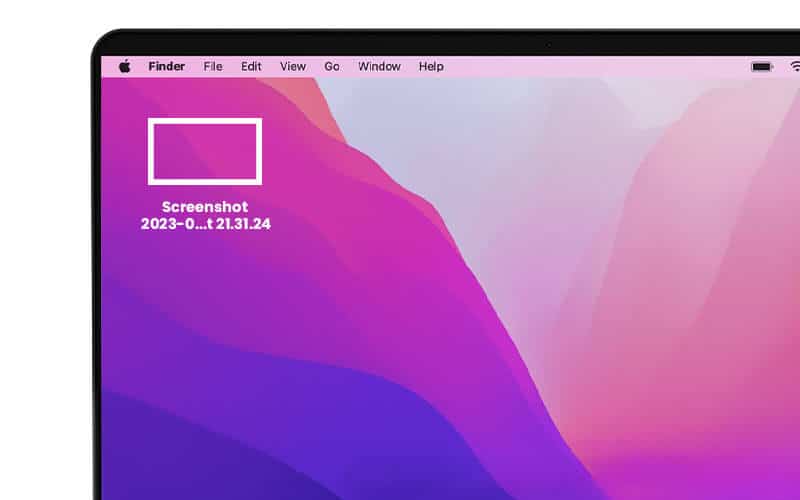
When you take a screenshot on a Mac, it is automatically saved to the desktop with the file name “Screen Shot,” followed by the date and time. This standard setup makes identifying and organizing screenshots simple, allowing you to focus on other jobs or activities.
If you want more particular naming conventions for your screen captures, use the Terminal program and enter specific instructions to customize the labels to meet your needs. This method enables you to build file names that capture essential information about each screenshot, making it even easier to stay organized.
Changing Save Locations and Formats
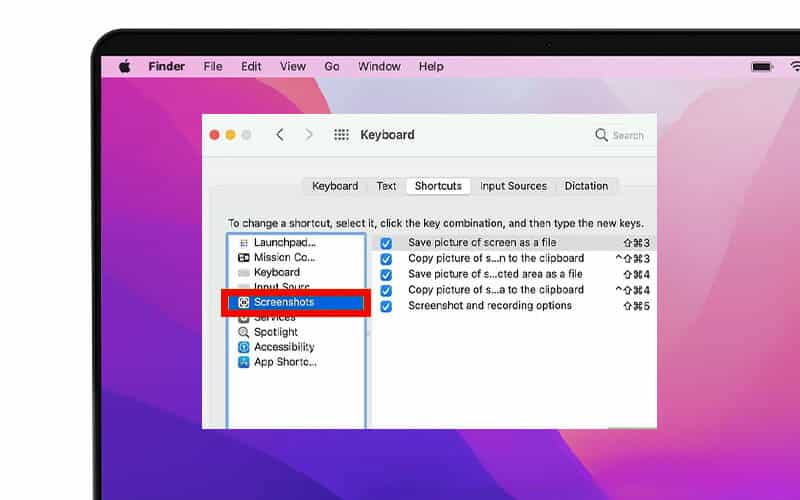
If you need to change your screenshots’ storage location or format, you can use the Screenshot app to easily select a folder on your Mac, such as Documents, Music, Videos, or Photos, to store your screenshots.
Additionally, you can choose from various formats when using the Save As menu options. With these customization capabilities, you can ensure that every detail is accounted for, allowing you to work efficiently and achieve the desired results when preserving screenshot images.
Conclusion
Remember to use these convenient keyboard shortcuts next time you need to take a screenshot on your Mac. To capture the entire screen, simply press Shift-Command-3. To capture a specific region or window, use Shift-Command-4 and select the desired area with the crosshair cursor. If you want to explore more options, like recording your screen, try Shift-Command-5 to access the Screenshot application.
After you’ve taken your screenshots, use the Markup tools to improve them. To access the Markup features, click on the floating thumbnail that displays after taking a screenshot. Add shapes, text, and other comments to make your captures more aesthetically appealing and effective at conveying vital information. You can also use advanced editing features like cropping, rotating, resizing, and signing PDFs.
Frequently Asked Questions
What are the shortcuts for screenshots on Mac?
Full-Screen Capture:
- Press the Shift + Command + 3 keys simultaneously.
- The entire screen will be captured, and the screenshot will be saved as a file on your desktop.
Window/Custom Area Capture:
- Press the Shift + Command + 4 keys simultaneously.
- The cursor will change to a crosshair.
- Click and drag the crosshair to select the window you want to capture.
- Release the mouse button to take the screenshot, which will be saved on your desktop.
To open the Screenshot App:
- Press the Shift + Command + 5 keys simultaneously.
- The Screenshot App will provide various screenshot options.
- Choose the desired screenshot type (full screen, window, or custom region).
- Capture the screenshot according to the selected option.
- The screenshot will be saved as a file on your desktop.
How do I take a screenshot?
To take a screenshot of the entire screen on Mac, simply press Shift+Command+3. It will be saved in your desktop folder by default.
How do you take a screenshot on your Mac without a mouse?
You can quickly capture a screenshot on Mac without using a mouse. All you have to do are the steps below. The screenshots taken will be stored directly on your desktop computer as PNG files.
If you need to change your screenshots’ storage location or format, you can use either the Screenshot app or the keyboard shortcuts Command + Shift + 3 or Command + Shift + 4. These options allow you to easily select a folder on your Mac, such as Documents, Music, Videos, or Photos, to store your screenshots.tos, to store your screenshots.
Additionally, you can choose from various formats when using the Save As menu options. With these customization capabilities, you can ensure that every detail is accounted for, allowing you to work efficiently and achieve the desired results when preserving screenshot images.
- Press and hold the Command key on your keyboard.
- Press and hold the Shift key.
- Depending on what you want to capture, choose one of the following options:
- Option 1. To save your entire screen display: Press 3.
- Option 2. To capture a specific window area: Press 4.
How do you manually screenshot on a Mac without a keyboard?
To take a screenshot without the keyboard, simply follow these steps:
- Open up your Applications folder.
- Head to Utilities.
-
Launch the Screenshot application.
Does Mac have a screenshot tool?
Mac provides a Screenshot Tool by pressing the Shift-Command-5 combination found in Launchpad. This can capture any part of your screen, such as windows, an entire page, or even specific sections you select. The tool enables users to take screenshots and save them for later use.
